Creating Tasks and Accepting Reservations: Accept a Reservation using Assignment Callback Instructions
In the previous step, you created a Task and accepted it using the Reservations subresource of the REST API. This time, you create another Task using the REST API, but have your server accept the Reservation as soon as it is notified, via a synchronous HTTP response.
Before we create the next Task, once again make sure that our Worker Alice is in a non-available Activity state.
Call the Create Task endpoint exposed with run.py again, or execute the following curl command:
1curl https://taskrouter.twilio.com/v1/Workspaces/{WorkspaceSid}/Tasks \2--data-urlencode Attributes='{"selected_language": "es"}' \3-d WorkflowSid={WorkflowSid} \4-u {AccountSid}:{AuthToken}
This time, before bringing Alice online, we need to make changes to our assignment_callback method in our run.py. Open it and modify the existing code to reflect the following:
1from flask import Flask, request, Response2from twilio.rest import Client34app = Flask(__name__)56# Your Account Sid and Auth Token from twilio.com/user/account7account_sid = "{{ account_sid }}"8auth_token = "{{ auth_token }}"9workspace_sid = "{{ workspace_sid }}"10workflow_sid = "{{ workflow_sid }}"1112client = Client(account_sid, auth_token)1314@app.route("/assignment_callback", methods=['GET', 'POST'])15def assignment_callback():16"""Respond to assignment callbacks with an acceptance and 200 response"""1718ret = '{"instruction": "accept"}'19resp = Response(response=ret, status=200, mimetype='application/json')20return resp2122@app.route("/create_task", methods=['GET', 'POST'])23def create_task():24"""Creating a Task"""25task = client.taskrouter.workspaces(workspace_sid) \26.tasks.create(workflow_sid=workflow_sid,27attributes='{"selected_language":"es"}')2829print(task.attributes)30resp = Response({}, status=200, mimetype='application/json')31return resp3233@app.route("/accept_reservation", methods=['GET', 'POST'])34def accept_reservation():35"""Accepting a Reservation"""36task_sid = request.args.get('task_sid')37reservation_sid = request.args.get('reservation_sid')3839reservation = client.taskrouter.workspaces(workspace_sid) \40.tasks(task_sid) \41.reservations(reservation_sid) \42.update(reservation_status='accepted')4344print(reservation.reservation_status)45print(reservation.worker_name)4647resp = Response({}, status=200, mimetype='application/json')48return resp4950if __name__ == "__main__":51app.run(debug=True)
Instead of returning an empty JSON document as before, we've included an 'assignment instruction' in our response. The 'accept' assignment instruction tells TaskRouter to automatically accept the Reservation and assign the Task to the Worker it has been reserved for.
To kick this process off, we need to transition Alice to an available Activity. With your Workspace open in the TaskRouter web portal, click 'Workers' then click to edit Alice and set her Activity to 'Idle'.
Now, click 'Tasks' in the main navigation and you should see that the Task has an Assignment Status of 'assigned':
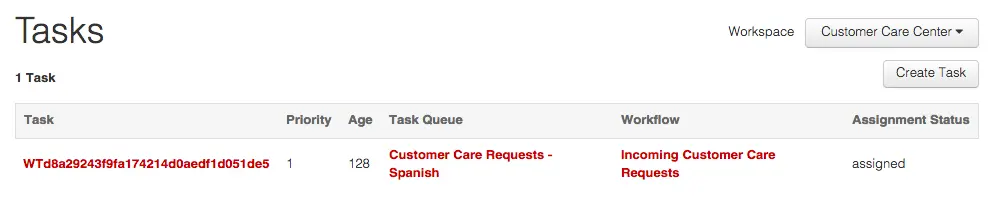
What actually happened is that Alice was reserved for a very short period of time. TaskRouter made a request to your web server at the Assignment Callback URL, and your server told TaskRouter to accept the Reservation. At that point, Alice's Activity transitioned to the 'Assignment Activity' of the TaskQueue that assigned the Task, as it did in the previous step.

You created another Task using the REST API, accepted it via an assignment instruction at your Workflow's Assignment Callback URL, and saw that this immediately accepted the Reservation for your Worker.
Next, you learn shortcuts to create Tasks that originate from Twilio phone calls.